
Apache Pinot: Copying a segment to a new table
In this post we’ll learn how to use the same Pinot segment in multiple tables.

Setup
First, we’re going to spin up a local instance of Pinot using the following Docker compose config:
version: '3.7'
services:
  zookeeper:
    image: zookeeper:3.5.6
    hostname: zookeeper
    container_name: manual-zookeeper
    ports:
      - "2181:2181"
    environment:
      ZOOKEEPER_CLIENT_PORT: 2181
      ZOOKEEPER_TICK_TIME: 2000
  pinot-controller:
    image: apachepinot/pinot:0.9.0
    command: "StartController -zkAddress manual-zookeeper:2181"
    container_name: "manual-pinot-controller"
    volumes:
      - ./config:/config
      - ./data:/data
    restart: unless-stopped
    ports:
      - "9000:9000"
    depends_on:
      - zookeeper
  pinot-broker:
    image: apachepinot/pinot:0.9.0
    command: "StartBroker -zkAddress manual-zookeeper:2181"
    restart: unless-stopped
    container_name: "manual-pinot-broker"
    volumes:
      - ./config:/config
      - ./data:/data
    ports:
      - "8099:8099"
    depends_on:
      - pinot-controller
  pinot-server:
    image: apachepinot/pinot:0.9.0
    command: "StartServer -zkAddress manual-zookeeper:2181"
    restart: unless-stopped
    container_name: "manual-pinot-server"
    volumes:
      - ./config:/config
      - ./data:/data
    depends_on:
      - pinot-broker
Data
We’ll be working with a CSV file taken from Pinot’s documentation:
| studentID | firstName | lastName | gender | subject | score | timestampInEpoch |
|---|---|---|---|---|---|---|
200 |
Lucy |
Smith |
Female |
Maths |
3.8 |
1570863600000 |
200 |
Lucy |
Smith |
Female |
English |
3.5 |
1571036400000 |
201 |
Bob |
King |
Male |
Maths |
3.2 |
1571900400000 |
202 |
Nick |
Young |
Male |
Physics |
3.6 |
1572418800000 |
Create Table
Let’s create a Pinot schema and table based on this CSV file.
The schema is defined below:
{
  "schemaName": "transcript",
  "dimensionFieldSpecs": [
    {
      "name": "studentID",
      "dataType": "INT"
    },
    {
      "name": "firstName",
      "dataType": "STRING"
    },
    {
      "name": "lastName",
      "dataType": "STRING"
    },
    {
      "name": "gender",
      "dataType": "STRING"
    },
    {
      "name": "subject",
      "dataType": "STRING"
    }
  ],
  "metricFieldSpecs": [
    {
      "name": "score",
      "dataType": "FLOAT"
    }
  ],
  "dateTimeFieldSpecs": [{
    "name": "timestampInEpoch",
    "dataType": "LONG",
    "format" : "1:MILLISECONDS:EPOCH",
    "granularity": "1:MILLISECONDS"
  }]
}
Our table config is defined below:
{
    "tableName": "transcript",
    "tableType": "OFFLINE",
    "segmentsConfig": {
      "replication": 1
    },
    "tenants": {
      "broker":"DefaultTenant",
      "server":"DefaultTenant"
    },
    "tableIndexConfig": {
      "loadMode": "MMAP"
    },
    "ingestionConfig": {
      "batchIngestionConfig": {
        "segmentIngestionType": "APPEND",
        "segmentIngestionFrequency": "DAILY"
      }
    },
    "metadata": {}
}
Now let’s create the table and schema:
docker exec -it manual-pinot-controller bin/pinot-admin.sh AddTable   \
  -tableConfigFile /config/table.json   \
  -schemaFile /config/schema.json -exec
Import CSV file
After we’ve done that, it’s time to import the CSV file. We’ll do this using the ingestion job spec defined below:
executionFrameworkSpec:
  name: 'standalone'
  segmentGenerationJobRunnerClassName: 'org.apache.pinot.plugin.ingestion.batch.standalone.SegmentGenerationJobRunner'
  segmentTarPushJobRunnerClassName: 'org.apache.pinot.plugin.ingestion.batch.standalone.SegmentTarPushJobRunner'
jobType: SegmentCreationAndTarPush
inputDirURI: '/data'
includeFileNamePattern: 'glob:**/transcript.csv'
outputDirURI: '/opt/pinot/data/transcript'
overwriteOutput: true
pinotFSSpecs:
  - scheme: file
    className: org.apache.pinot.spi.filesystem.LocalPinotFS
recordReaderSpec:
  dataFormat: 'csv'
  className: 'org.apache.pinot.plugin.inputformat.csv.CSVRecordReader'
  configClassName: 'org.apache.pinot.plugin.inputformat.csv.CSVRecordReaderConfig'
tableSpec:
  tableName: 'transcript'
pinotClusterSpecs:
  - controllerURI: 'http://localhost:9000'
includeFileNamePattern refers to the transcript.csv file that we saw earlier in this post.
We can run the ingestion job like so:
docker exec \
  -it manual-pinot-controller bin/pinot-admin.sh LaunchDataIngestionJob \
  -jobSpecFile /config/job-spec.yml
This ingestion job does two things.
segmentGenerationJobRunnerClassName writes the segment file to the deep store, which is stored under /opt/pinot/data/transcript on our Pinot Controller container.
We can run the following command to check that it’s there:
docker exec -it manual-pinot-controller ls -lh /opt/pinot/data/transcripttotal 4.0K
-rw-r--r-- 1 root root 1.7K Dec 6 17:08 transcript_OFFLINE_0.tar.gzAnd then once the segment has been written to the deep store, segmentTarPushJobRunnerClassName copies the segment file down to the Pinot Server.
Copy segment to new table
Now let’s say we create a new table transcript2 that uses the same schema, but has an inverted index on one of the columns.
The table config is described below:
{
    "tableName": "transcript2",
    "tableType": "OFFLINE",
    "segmentsConfig": {
      "replication": 1,
      "schemaName": "transcript"
    },
    "tenants": {
      "broker":"DefaultTenant",
      "server":"DefaultTenant"
    },
    "tableIndexConfig": {
      "loadMode": "MMAP",
      "invertedIndexColumns": ["subject"]
    },
    "ingestionConfig": {
      "batchIngestionConfig": {
        "segmentIngestionType": "APPEND",
        "segmentIngestionFrequency": "DAILY"
      }
    },
    "metadata": {}
}
Create the table:
docker exec -it manual-pinot-controller bin/pinot-admin.sh AddTable   \
  -tableConfigFile /config/table-indexes.json \
  -exec
Once the table’s created, we’re going to download the segment (transcript_OFFLINE_0.tar.gz) to this table, which we can do using the following ingestion job spec:
executionFrameworkSpec:
  name: 'standalone'
  segmentTarPushJobRunnerClassName: 'org.apache.pinot.plugin.ingestion.batch.standalone.SegmentTarPushJobRunner'
jobType: SegmentTarPush
outputDirURI: '/opt/pinot/data/transcript'
pinotFSSpecs:
  - scheme: file
    className: org.apache.pinot.spi.filesystem.LocalPinotFS
tableSpec:
  tableName: 'transcript2'
pinotClusterSpecs:
  - controllerURI: 'http://localhost:9000'
This time our job type is SegmentTarPush, which means it will only run the segmentTarPushJobRunnerClassName job. This job will (indirectly) copy the segment from outputDirURI down to the Pinot Server.
docker exec \
  -it manual-pinot-controller bin/pinot-admin.sh LaunchDataIngestionJob \
  -jobSpecFile /config/job-spec-download-only.yml
We can then navigate to the transcripts2 table (via http://localhost:9000/#/tables) in the Pinot Data Explorer, and see that the segment has been loaded:
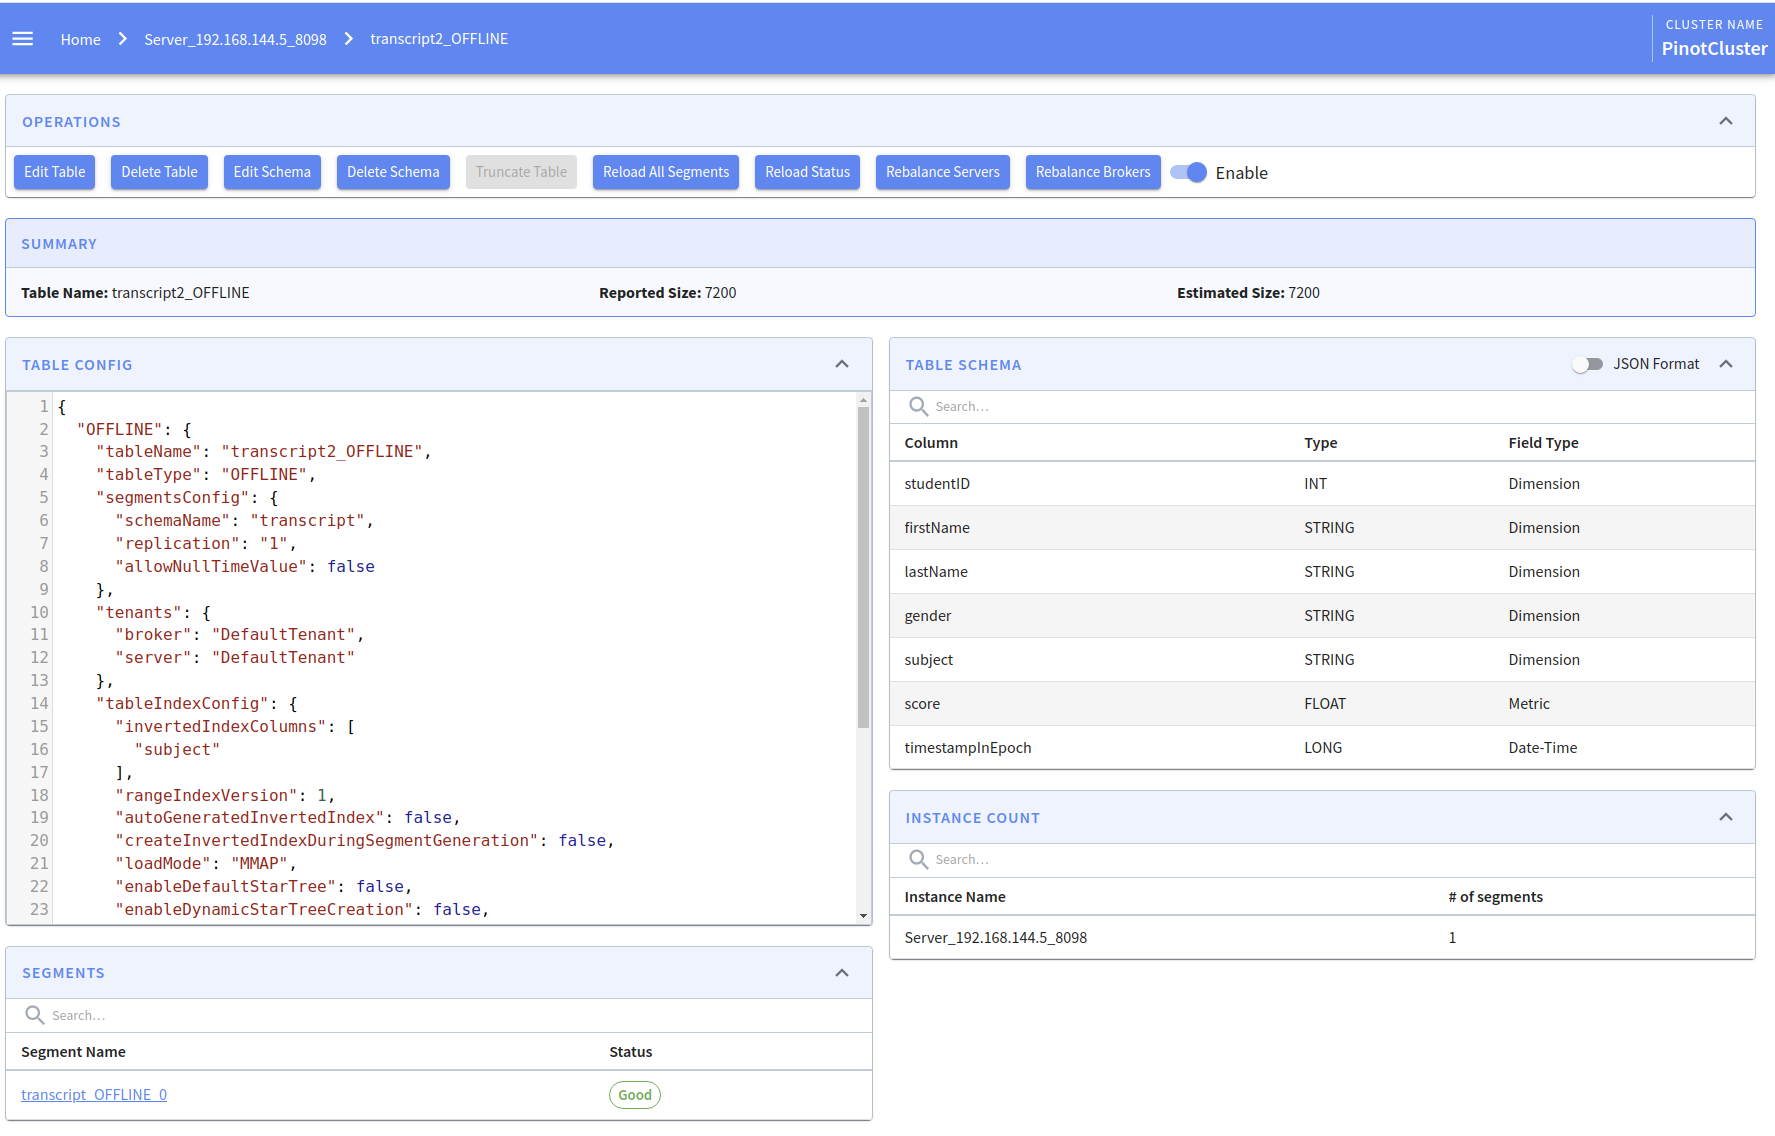
We can now run queries against this segment from the transcripts2 table.
About the author
I'm currently working on short form content at ClickHouse. I publish short 5 minute videos showing how to solve data problems on YouTube @LearnDataWithMark. I previously worked on graph analytics at Neo4j, where I also co-authored the O'Reilly Graph Algorithms Book with Amy Hodler.